Week 3: More Customization
Changing Your Fonts
By default, websites display fonts that are installed on the computer of the person looking at the site.
There are some basic fonts most computers have (like Times New Roman, Helvetica, Arial, Comic Sans)
To display a specific font, we will need to use CSS.
Fonts are Files
Fonts are actual files on your computer. Most of them have file extensions like .ttf or .otf
There's two ways to display a special font on your website.
- Download a font file to your website folder
- Link to a font that already exists online (like Google Fonts)
We're going to use Google Fonts in this class.
Using Google Fonts for Your Website
- Go to fonts.google.com
- Find a font you like (use the filters on the side)
- Go to the font page
- Click Get Font then <> Get Embed Code
This page explains where to put each piece of code. The first part goes after the <head> tag in your HTML file. The second part goes after the <style> tag with your other CSS.
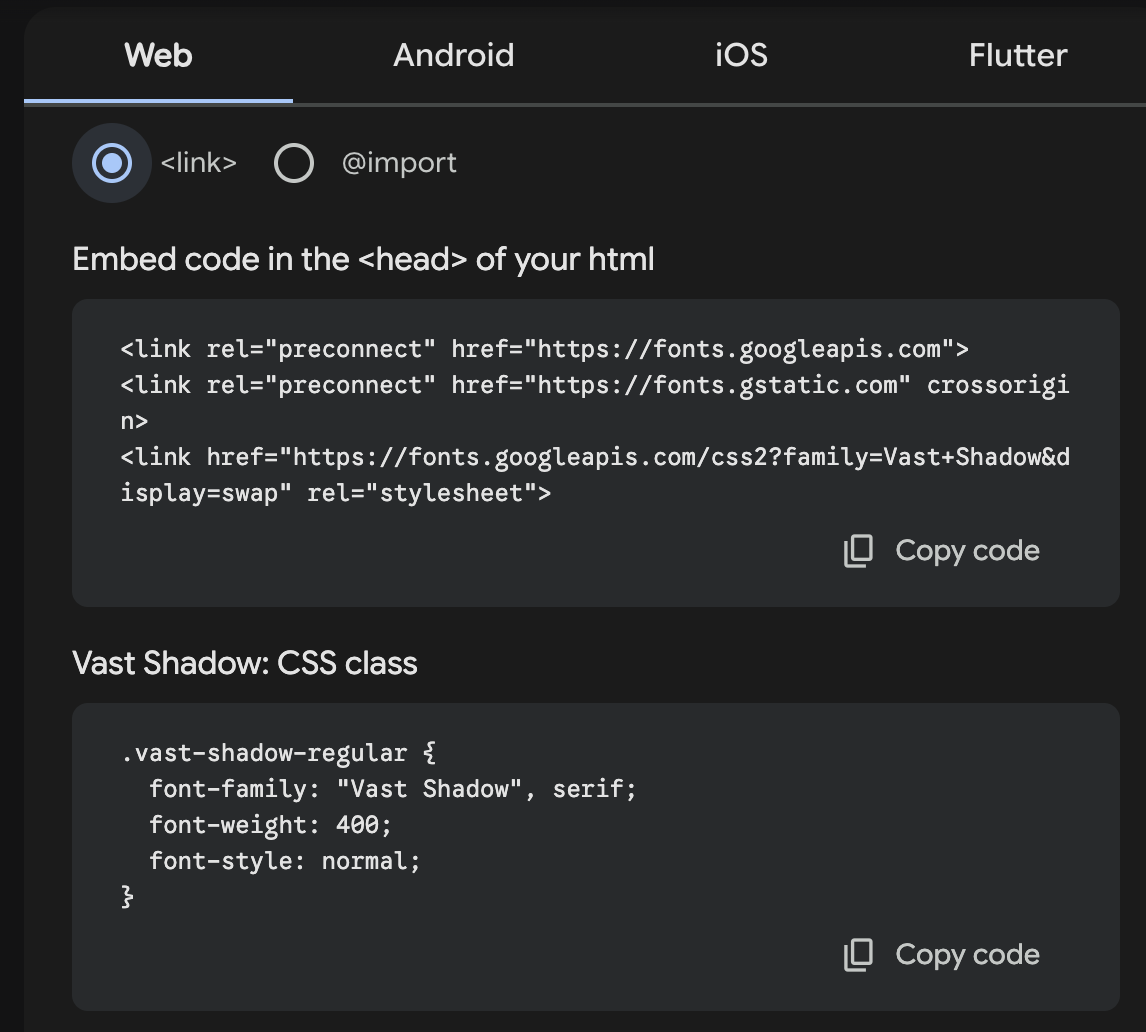
For the CSS code that Google gives you, you don't need the whole thing. Just copy the line that starts with "font-family" and put it where you want to change the font. In this example, I changed the h1 and h2 to be the special font.
font-family: "Vast Shadow", serif;
font-weight: 400;
}
Attributes
Attributes are extra information you give to HTML elements. The bold text bellow indicates the attribute.
<img src=”mariocart.jpg”>
<a href=”http://nintendo.com”>Nintendo</a>
<p class=”special”>My very important text goes here.</p>
Classes
Classes are a type of attribute you can give to an element. You define it with CSS and also include it in your HTML tag.
Above is what it looks like in your HTML. Below is the CSS you will add after your <style> tag.
background-color: lightgray;
color: blue;
}